

Key Takeaways
Why Your Toilet Keeps Running - and Why It Matters
A running toilet is one of the most common household plumbing problems, and fortunately, one of the most fixable without professional help. The noise you hear - that low hiss or constant trickle - means water is escaping the tank before or after each flush cycle, and the fill valve keeps running to compensate. Left unaddressed, this quiet waste can add meaningfully to your water bill and accelerate wear inside the tank.
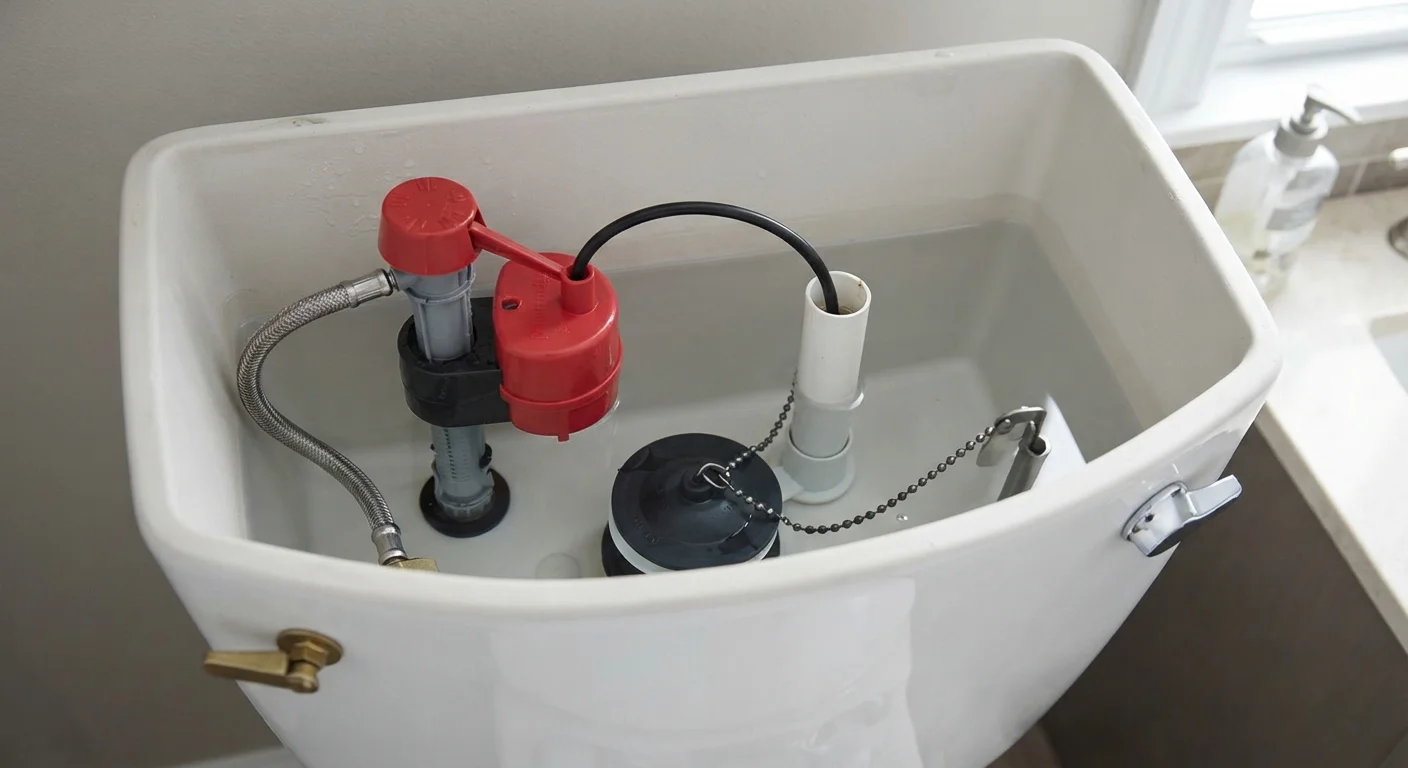
The three components responsible for nearly every case are the flapper (the rubber seal at the bottom of the tank), the fill valve (which controls incoming water), and the float (which signals the fill valve to shut off when the tank is full). All three are inexpensive and available at any hardware store. Understanding which part is failing - before you buy anything - makes the repair faster and more confident. For broader context on what common plumbing assumptions get wrong, see our guide to plumbing maintenance myths.
Continuously Running Toilets Add Up Fast
A toilet that runs non-stop can waste 200 gallons or more per day, depending on severity. Beyond the water bill impact, persistent water movement can wear down the flush valve seat over time, turning a simple part swap into a more costly repair. Address a running toilet promptly rather than treating it as a minor inconvenience.
What You'll Need Before You Start
This repair requires no advanced plumbing knowledge. You'll work entirely inside the toilet tank - no pipe cutting, soldering, or wall access required. Gather the items below before shutting off the water so the job moves smoothly from start to finish.
What you will need
Adjustable pliers
Used to loosen and tighten the fill valve locknut when replacing the fill valve.
Replacement flapper
Directly replaces a worn or warped flapper that allows water to leak from the tank into the bowl.
Universal fill valve
Replaces a faulty fill valve that causes the tank to overfill or never shut off.
Towel or small bucket
Catches residual water in the tank and on the floor during disassembly.
Food coloring or dye tablet
Dropped into the tank to reveal whether the flapper is leaking without opening the tank.
If you've recently dealt with a dripping faucet and want to sharpen your diagnostic instincts, our leaky faucet repair guide walks through a similar process of matching symptoms to failing parts.
Step-by-Step Repair Instructions
Work through the steps below in order. Diagnosing correctly in Step 1 often means you'll only need to complete one or two of the remaining steps rather than all of them.
Diagnose the source of the running
Lift the tank lid and set it safely aside. Listen and watch for two minutes. If water is trickling into the bowl continuously, the flapper is likely leaking. If water is spilling into the overflow tube - the tall vertical pipe in the center - the float is set too high or the fill valve is faulty. Drop a few drops of food coloring into the tank without flushing; if color appears in the bowl within 10-15 minutes, the flapper is confirmed as the culprit.
Shut off the water supply
Turn the shut-off valve clockwise until it stops. Flush the toilet once to drain most of the water from the tank. Use a towel or small sponge to remove any remaining water at the bottom of the tank before proceeding.
Replace the flapper
Unhook the flapper's ears from the pegs on either side of the flush valve seat, then disconnect the chain from the flush handle arm. Bring the old flapper to the hardware store to match the size - most are 2-inch or 3-inch. Snap the new flapper onto the valve pegs and reconnect the chain, leaving about half an inch of slack. Too much slack means the flapper closes before a full flush; too little means it won't seal.
Adjust or replace the float
The water level in the tank should sit about one inch below the top of the overflow tube. If it's higher, water spills into the tube and the toilet runs constantly. For a ball-float arm, bend the arm slightly downward or turn the adjustment screw counterclockwise to lower the water level. For a cup-style float (attached to the fill valve shaft), pinch the adjustment clip and slide it down, or turn the adjustment dial clockwise. Turn the water back on briefly to verify the new water level, then shut it off again if further work is needed.
Replace the fill valve if needed
If adjusting the float doesn't stop the running, replace the fill valve. With the water off and the tank emptied, disconnect the water supply line from the bottom of the tank. Use adjustable pliers to unscrew the locknut on the underside of the tank and lift out the old fill valve. Insert the new universal fill valve, following package instructions to set the correct height. Hand-tighten the locknut, reconnect the supply line, and turn the water back on. Adjust the float on the new valve until the water level sits one inch below the overflow tube.
Test and confirm the repair
Restore water supply fully and allow the tank to fill. Flush twice and watch the tank refill completely. Confirm the fill valve shuts off cleanly, no water spills into the overflow tube, and the bowl stays clear after flushing. Replace the tank lid. If the toilet continues to run after addressing the flapper, float, and fill valve, the flush valve seat itself may be worn or cracked - that repair is more involved and typically warrants a licensed plumber.
Match Parts Before You Buy
Toilet hardware is not fully standardized. When possible, note your toilet's brand and model number (usually stamped inside the tank) before heading to the hardware store. While universal flappers and fill valves fit the majority of tanks, proprietary designs exist and can frustrate an otherwise simple repair.
Know When to Call a Plumber
The steps above cover the vast majority of running toilet causes. However, if you notice cracks in the tank porcelain, a damaged flush valve seat that the flapper won't seal against, or persistent leaking after replacing all components, stop the repair and contact a licensed plumber. Attempting to repair structural porcelain damage yourself can lead to a full tank failure and significant water damage.